The OPM Flow software allows simulation of modified black oil models using ECLIPSE format input decks. The software is designed to be run on Linux or MacOS platforms, but it is also possible to run on Windows through a virtual machine or on the Windows Subsystem for Linux). Use of a virtual machine will emulate an entire Linux desktop environment within a window and allows OPM Flow to be run within this virtual Linux environment. Given that OPM Flow is a command line program and does not require any GUI elements, the virtual machine approach could be considered overkill. The alternative approach is to use the Windows Subsystem for Linux to which allows native Linux binaries to be run within Windows through provision of a layer that maps Linux kernel calls to Windows kernel calls. More simply, it allows Linux programs to be run on Windows.
What is Windows Subsystem for Linux?
The Windows Subsystem for Linux (WSL) allows native Linux programs to be run from within Windows alongside other Windows applications. This is done through a shell terminal which provides a Linux command-line environment and access to the Windows filesystem. In essence WSL will translate calls made by Linux programs into the equivalent calls within Windows. This is very different to emulation, which is a software application that mimics the behaviour of a different device or environment.
Instructions for installation of a working environment are included in the OPM Flow Manual and it is quite straightforward. Detailed installation instructions from Microsoft are perhaps the more definitive reference for installing WSL.
Updating WSL 1 to WSL 2
The original version of WSL was introduced in 2016 and provided a Linux-compatible kernel interface. This interface was developed by Microsoft and contained no Linux kernel code. In 2019 Microsoft has introduced an improved version of WSL, informatively referred to as WSL 2. This implementation uses a Linux kernel running in a lightweight virtual machine environment – in effect a Linux environment running within Windows as a virtual machine.
Differences between WSL 2 and WSL 1 are primarily related to the implementation of the latest virtualisation technology at the cost of slower inter-OS filesystem performance. This means that writing of log files and output from the simulator is slower under WSL 2 in comparison to WSL 1. Running the SPE3 deck in OPM Flow under both WSL 1 and WSL 2 resulted in the same execution time for the linear solver but with an increase from 0.21 seconds to 1.45 seconds to write the output files. On the other hand, a benchmarking comparison between native Ubuntu 20.04, WSL 1 and WSL 2 showed that on average WSL 2 is 21% faster than WSL 1, with WSL 2 running ~92% of the bare metal speed (bare metal = native OS, not virtual OS). Given that most time will be spent with the linear solver, there does not appear (at first glance) to be a compelling reason to stick with WSL 1.
Updating from WSL 1 to WSL 2 was a little harder than expected as I came across an error “Please enable the Virtual Machine Platform Windows feature and ensure virtualization is enabled in the BIOS.” For once this error message was informative and provides an indication of two steps that are necessary:
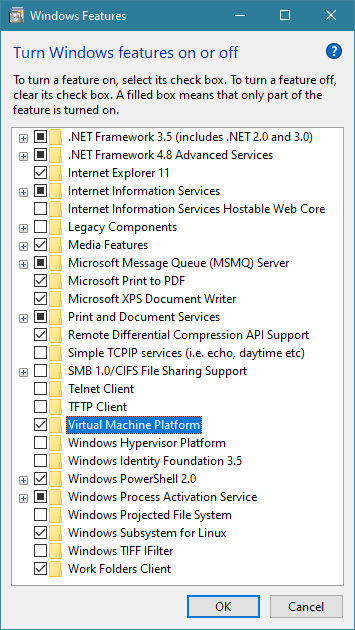
- Enabling the Virtual Machine Platform is straightforward as this can be enabled under Windows Features control panel (shown in Figure 1). After ticking the checkbox and selecting
OKWindows will enable the feature and require a restart. This provides an opportunity to boot into the BIOS for step 2… - For enabling virtualization it was necessary to turn on SVM = Secure Virtual Machine in the BIOS, which is disabled by default. Instructions on how to do this are beyond the scope of this blog post, although I strongly suspect that if anyone reading this has an interest in running OPM Flow under WSL 2 then they probably possess the skills needed to work out how to do this on their own system. It should also be noted that OPM Flow will run under WSL 1, so this step is not a requirement.
Once this was done I was able to run Windows PowerShell and the command:
wsl --set-version Ubuntu 2
This updated the existing WSL version from 1 to 2 which we can check using the command:
wsl --list --verbose
Installing OPM Flow on WSL
To install OPM Flow is disarmingly straightforward once the Linux shell environment has been enabled and started up. First we add/update the respository:
sudo apt-add-repository ppa:opm/ppa
sudo apt-get update
Then we install the simulator:
sudo apt install libopm-simulators1-bin
Thats it!
To test the installation run the command:
flow --help
This should list the different options available when running OPM Flow.
Running an Input Deck and Visualising Results
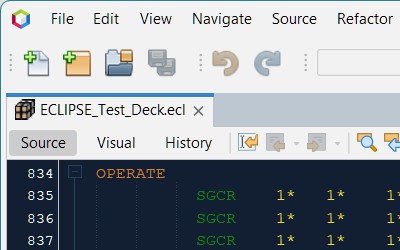
Several datasets are available to test. These include the Norne field (for which a complete real-world dataset was made available by the operator Statoil in 2013) and several cases from the SPE Comparative Solution Project. As an example we run the SPE3CASE1.DATA file, which is the input deck for the Third SPE Comparative Solution Project (under a modified black oil model rather than a compositional simulation).
If you are running OPM Flow on Windows then it is likely that one of the first challenges you will encounter is the need to access this data file on the Windows filesystem. Where Windows uses drive letters, these are mount points under Linux. Therefore the “C:” drive can be accessed at /mnt/c etc. The simplest way to run a data file stored in the Windows filesystem is to navigate to the directory where the data file is stored:
cd /mnt/<drive-letter>/<path-to-datafile>
The basic command to run the flow simulator is:
flow SPE3CASE1.DATA
The output can be opened in the sister project ResInsight by importing the .egrid output file that was generated. The results generated and the completed flow simulation in an Ubuntu shell window, both running under Windows 10, are shown in Figure 2.

Whilst not all keywords are implemented in OPM Flow, it is working at a functional level whereby it could be used for running real-world reservoir simulations. Best of all, it can be run from within Windows without use of a full-blown virtual machine setup or dual-boot environment.
Speed Up Runs with Multicore Parallel
Some reservoir simulation software only offers the ability to use all the processing power of a machine if an additional parallel processing licence is purchased. This predatory pricing is, in my opinion, unethical. Why should the owner of the hardware, who has invested into that hardware for the very purpose of solving computational problems, have the capability of that hardware hamstrung by the very software that is supposed to be using it? It makes no sense.
Fortunately OPM Flow does not fall into this trap and allows multiple processors or cores to be utilised. This is as simple as running the simulation with a different command line.
mpirun -np 8 flow NORNE_ATW2013.DATA
This runs the Norne reservoir model dataset using eight processors (the machine that I am currently using for testing has a Ryzen 7 1700 processor with eight cores). N.B. there is no point running the simple SPE Comparative Solution Project example above using this approach as the overhead associated with setting up the parallel run outweighs the run time, therefore a larger simulation case was chosen to test the single core versus parallel processing comparison.
The results shown in Figure 3 demonstrate a speed up of the simulation run with parallel processing, albeit an improvement that is not linear with the number of cores available. Nonetheless, we shouldn’t complain about running the simulation twice as fast simply through the use of a different command line.
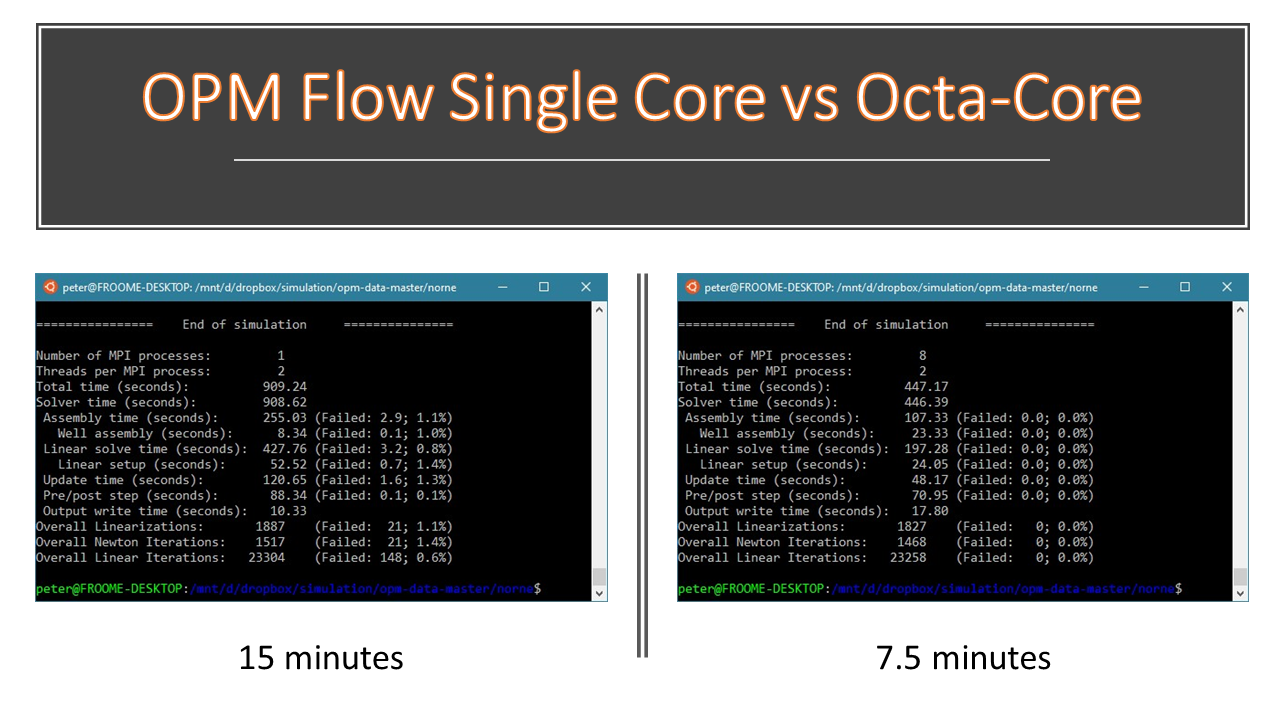
As a further comparison both the single core and octa-core runs were repeated under WSL 1. These run times were 14.1 minutes and 6.7 minutes respectively, or about 10% faster. This is an interesting result as it suggests that whilst WSL 2 is faster for many Linux applications, that is not the case for OPM Flow. A closer look at the computational time breakdown shows that the linear solver time is 197.28 seconds under WSL 2 versus 198.77 seconds under WSL 1. This is effectively identical. The speed gain comes from the faster IO of WSL 1 when dealing with the Windows filesystem.
Whilst slower I’ve decided to stick with WSL 2 as it is a technically better virtualisation implementation.
As a final thought, there is also the issue of getting OPM Flow to take advantage of GPU acceleration. According to the flow help page, an possible run option is --bda-device-id=INTEGER where the description given is, “Choose device ID for cusparseSolver or openclSolver, use ‘nvidia-smi’ or ‘clinfo’ to determine valid IDs. Default: 0”. Installing clinfo and running shows that the number of platforms is 0, indicating that no GPU is detected. After some googling, it became apparent that this is a highly requested feature for WSL, on account of the all machine learning applications that leverage GPU acceleration. GPU acceleration under WSL is apparently possible if you are on a Windows Insider preview build of Windows. For the moment, this is something that can be investigated in the future.