My previous upgrade was in early 2018 and involved a switch back to AMD with the Ryzen 7 on an ASRock X370 motherboard. AMD had always stated that they would continue to support the then new AM4 socket for many years and generations of the Ryzen CPU, so this was a possible long-term benefit. Every previous upgrade I had performed involved changing the motherboard and the CPU. Being able to drop a CPU in and out was a compelling upgrade path option. Of course, back in 2018, there was no way to know for sure whether this would end up being true, but it was something to look forward to.
Fast forward to early 2022. A fortuitous combination of events occurs. Firstly, the Zen 3 line of processors is starting to come down in pricing. In tandem, AMD announces that it will support the use of Zen 3 processors in X370 motherboards, leading to ASRock putting out a BIOS upgrade. An attractive carrot was dangled. An easy upgrade to more cores running at a faster speed for a reasonable price.
… and then there was also the stick. Windows 10 had decided it was going to incessantly nag me about upgrading to Windows 11. When I looked into what was involved, the upgrade readiness tool informed me that my CPU was not on the supported list. Say what?
Upgrading to Ryzen 9
This time around I decided to go all in with the upgrade. I’ve been doing a fair amount of work that involves multicore processing, some of it using Windows subsystem for Linux, so there was no doubt that there would be a benefit to be gained from more cores. This pointed to the Ryzen 9 5950X processor which should, in theory, be more than twice as fast with double the number of cores, a much faster clock speed and a boost to the number of instructions per clock for Zen 3 versus the original Zen.
| Processor | Base Clock | Boost Clock | Physical Cores / (Threads) | Thermal Design Power |
|---|---|---|---|---|
| Ryzen 7 1700 | 3.0 Ghz | 3.7 Ghz | 8C / (16T) | 65 W |
| Ryzen 9 5950X | 3.4 Ghz | 4.9 Ghz | 16C / (32T) | 105 W |
The original build of my machine dates back to 1999. Since then every single component has been replaced at least once, if not several times. The operating system has been upgraded from Windows 98 to Windows XP to Windows 7 to Windows 10 and now Windows 11. Fundamentally I still think of it as the same machine as with every upgrade, parts from the previous build are carried over into the new build.
Having built and supported my own machine for over two decades, you’d think that a simple CPU swap out should be a simple upgrade for me to handle. Well think again. I well and truely managed to create a mountain out of a molehill with this upgrade.
Enthusiasm Trumps Caution
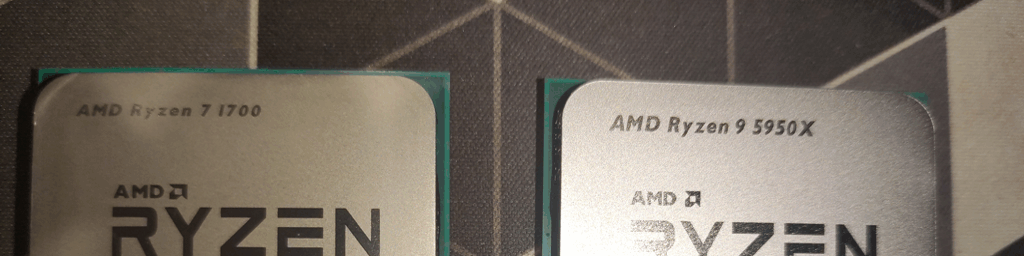
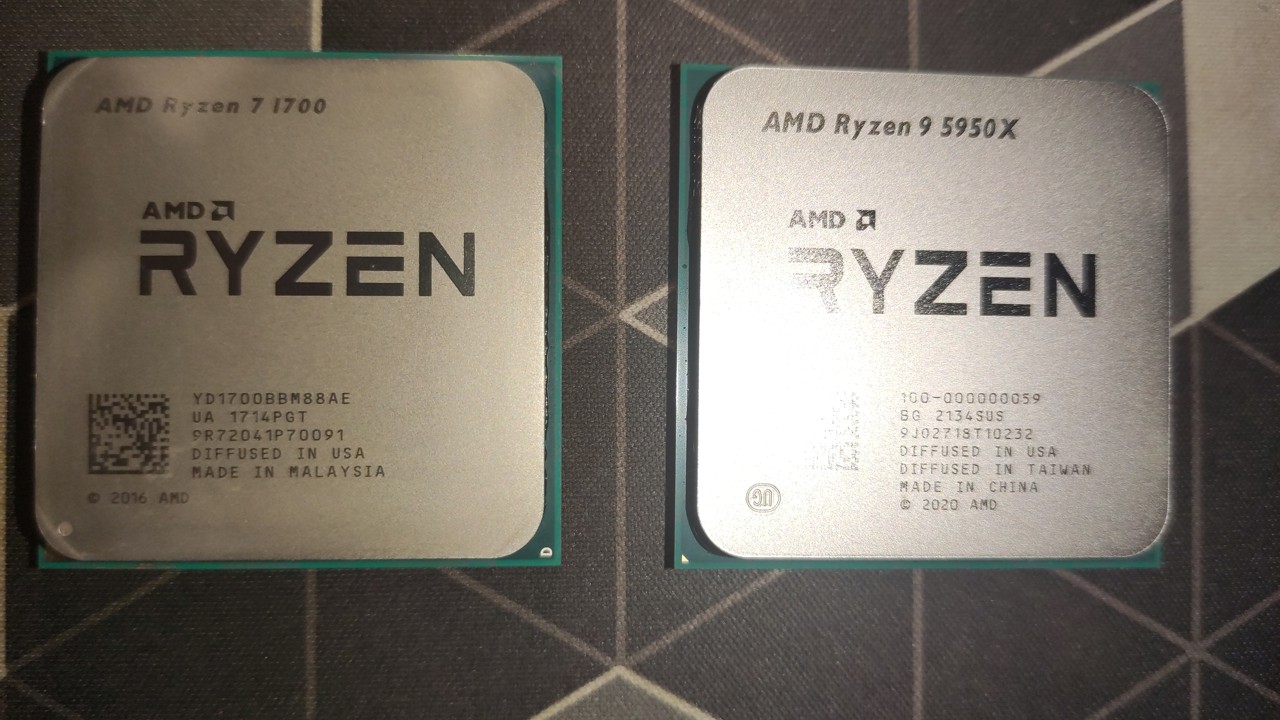
When the 5950X arrived I was in a great rush to see how it would perform. On the surface the processors look very similar, but in the beating hearts within there should be huge gain in performance. I just couldn’t wait to see.
So in a fit of enthusiasm I pull off the all-in-one cooler, remove the old CPU, put on the thermal paste, replace the new CPU into the machine, flip the switch and … a flicker of life and nothing. Cycle the power switch, same result.
Just as that sinking feeling of dread is slowing enveloping me, I suddenly remember – I forgot to update the BIOS first. Oops.
It’s a basic error, but one that is easily enough rectified. So, time to swap the processors back to the original 1700 so that I can update the BIOS. This went smoothly enough and it was time to switch back to the 5950X. AIO block comes off, take out the old CPU, thermal paste onto the new CPU, back into the slot, AIO block goes back on, flip the switch and … this time some of the fans spun up, but then nothing.
Now I’m really getting frustrated, or perhaps I’m confusing my panic for frustration. Whatever it is that I’m feeling, it’s clear that the CPU is not working. So rather than stress about it any further, I left it overnight. No point continuing to work without a clear head.
Fortunately the next day revealed the solution. When I’d swapped out the 5950X to put the 1700 back in, I’d been in a casual rush, and I had accidentally dropped the 5950X inside the case. What I’d missed is that when this happened, one of the very small pins on the CPU had become bent, and this meant that when trying to reinstall that CPU, the pin became completely bent out of shape and wasn’t lining up with its slot hole. Interestingly tweezers were far to big to bend the pin back into shape and I ended up using a sewing needle and some fine handwork (and prayers) to straighten the offending pin out.
When I very gingerly replaced the new CPU into the slot for the third time, I had almost given up. So when I powered on for another attempt, there was a huge sigh of relief as the computer booted up into the BIOS.
What Possessed Me to Upgrade Windows?
Given that Windows 11 has been described as an unnecessary replacement for Windows 10 it is reasonable to question why I felt there was a need to upgrade to Windows 11. “If it ain’t broke - don’t fix it” as they saying goes.
The thing is that Windows 11 requires a trusted platform mode (TPM) to run. This can be enabled from within the BIOS. It seemed like a good idea at the time, having just upgraded the BIOS for the new 5950X, to just bite the bullet and get everything set up in the BIOS.
With what should have been a red flag that I was heading down a path to more problems, I immediately hit upon another problem when trying to upgrade to Windows 11. In addition to TPM, there is a requirement to use an UEFI BIOS that is Secure Boot capable. I was unable to change this in the BIOS. This is because UEFI requires that the hard drive is formatted using the more modern GUID Partition Table (GPT) rather than the old Master Boot Record (MBR). Whenever I had updated my boot drive in the past, I had simply cloned the old drive onto the new one. I don’t recall having ever done a clean install in a long while. So even though my boot drive is now an NVMe M.2 solid state drive, it was still configured with MBR. This meant that I needed to convert the drive from MBR to GPT before I could switch to an UEFI BIOS.
After these shenanigans were despatched, Windows allowed me to update it to version 11. I immediately regretted it. In recent years I’ve come to like the full screen ‘Start’ menu that was introduced. I believe this was done principally for tablet devices and I’m guessing that it wasn’t used by many users – most of whom probably don’t even know it exists. Yet I’m not alone in realising that hitting the ‘Windows’ button on the keyboard to bring up a full screen menu with icons for all your commonly used programs grouped into categories was actually pretty efficient. It should be possible to fix with some registry edits, but honestly why was something useful and functional removed?
Eventually I started to run into issues with certain programs. Microsoft Teams has become a program used daily in the company I work for, and suddenly it was hanging when trying to join calls. The workaround was to launch Teams from within the Edge browser, and this particularly implementation would then work. Yet the desktop application stubbornly refused to work. The solution was to run the program in compatibility mode for Windows 8 after which Teams would behave as expected.
Let’s not even go near PowerPoint. Any time I try to launch a slideshow the whole program crashes. Even compatibility mode won’t fix this issue. Maybe this will mysteriously fix itself in time as drivers get updated. Until then, at least I have a great excuse for not presenting anything on my computer – unless I launch the Office365 version of PowerPoint via the Edge browser.
What a mess!
More Cooling is Needed
With the new 5950X CPU installed and Windows updated to version 11, and workarounds for problems implemented, it was time to get back to work.
Or so I thought.
The fans on my all-in-one (AIO) radiator were spinning at full speed. I’d set these to respond to CPU temperature, so it seemed the CPU must be running a little hot. What I hadn’t counted on was just how hot it was running. In idle it was sitting at 70 to 80 degrees and when trying to run any compute intensive tasks, the CPU would ramp up to 90 degrees. At this point thermal throttling would kick in and declock the processor so that the temperatures could be kept under 90 degrees. As a result I wasn’t able to access the full power of the processor.
Clearly the 5950X puts out a lot more heat than the 1700. Part of the problem was that the system had been flown from Singapore to Australia during COVID-19, and I was aware that there was a rather large air bubble within the cooling loop that had appeared as a result. So the cooler was not working as efficiently as it was when new, and it was having to dissipate a much larger heat load. My attempts to remove the air bubble just made the problem worse and eventually the AIO simply stopped working – leading to a worrying situation in which attempts to boot the computer would lead to the CPU heating up to more than 100 degrees before automatically shutting down. Had I destroyed the 5950X through overheating?
When I purchased the 5950X I had anticipated that the AIO might not be sufficient, and had mentally planned on building a replacement custom loop as a fallback. To maximise cooling in the available space of the case, I settled on one 280 radiator plus a 120 radiator driven by a combined reservoir/pump combination connected with soft tubing (I’m not quite ready to make the leap to hard tubing) with its more exacting installation requirements.
EKWB parts were ordered from PC Case Gear and arrived very well packed a few days later. Setting up a custom loop is much more involved than simply slapping on a big air cooler, and it took a while to measure out the tubing needed and plan the routing within the case. It took a couple of hours to figure everything out. Despite this, it was much easier than the first custom loop I built nearly 20 years earlier. The quality and ease of use for the EKWB parts was impressive.
After filling the loop and installing in the case, the moment of truth arrived. Would it work?
Fittingly, given all the other troubles I’d come across up to this point, the answer was “nope”. The computer would POST and I could get into the BIOS to check the pump and fan speeds, and the temperatures. This showed quite conclusively that the pump was not operating. Just nothing. Was it dead on arrival?
After a lot of Googling I determined that I needed to check the circuit board on the pump. It turns out that the pump used in the EK Kinetic is a very common industrial pump known as a Liang DDC. Disassembling the pump turned out to be quite easy and I was able to see that what had happened is that I had accidentally let water into the pump and into contact with the circuit board that controls the motor. Somewhere a short had resulted and killed the pump. Attempts to dry out the board and rescusitate the pump were in vain. The earlier custom loop I had built used an aquarium pump, which could tolerate being splashed with a little water. It seems that the trade-off for these new components looking better and being easier to install is that they need to be looked after a little better than I had done.
Fixing the Watercooling Pump
How can you fix a pump? The thought of ordering a replacement EK Kinetic reservoir/pump combo was galling. I just couldn’t bear the thought of the cost. As I looked into it a little more closely, I realised that one option would be to just find a replacement Laing DDC pump and replace that part. If I could replace the circuit board that might be even cheaper. The search led me to the wonderfully named “DIYINHK” which presumably stands for do-it-yourself in Hong Kong. DIYINHK make a replacement circuit board for the Laing DDC pump.
At this point, I’m figuring I haven’t got too much to lose. I was just supposed to be swapping a CPU, and I’m now looking at replacing a circuit board in a pump. So I ordered the circuit board and waited.
The board took a while to arrive, giving me plenty of time to unsolder the existing board. A comparison of the new board to the existing one was impressive. It has to be said that the quality of the replacement board is very high. And the design…
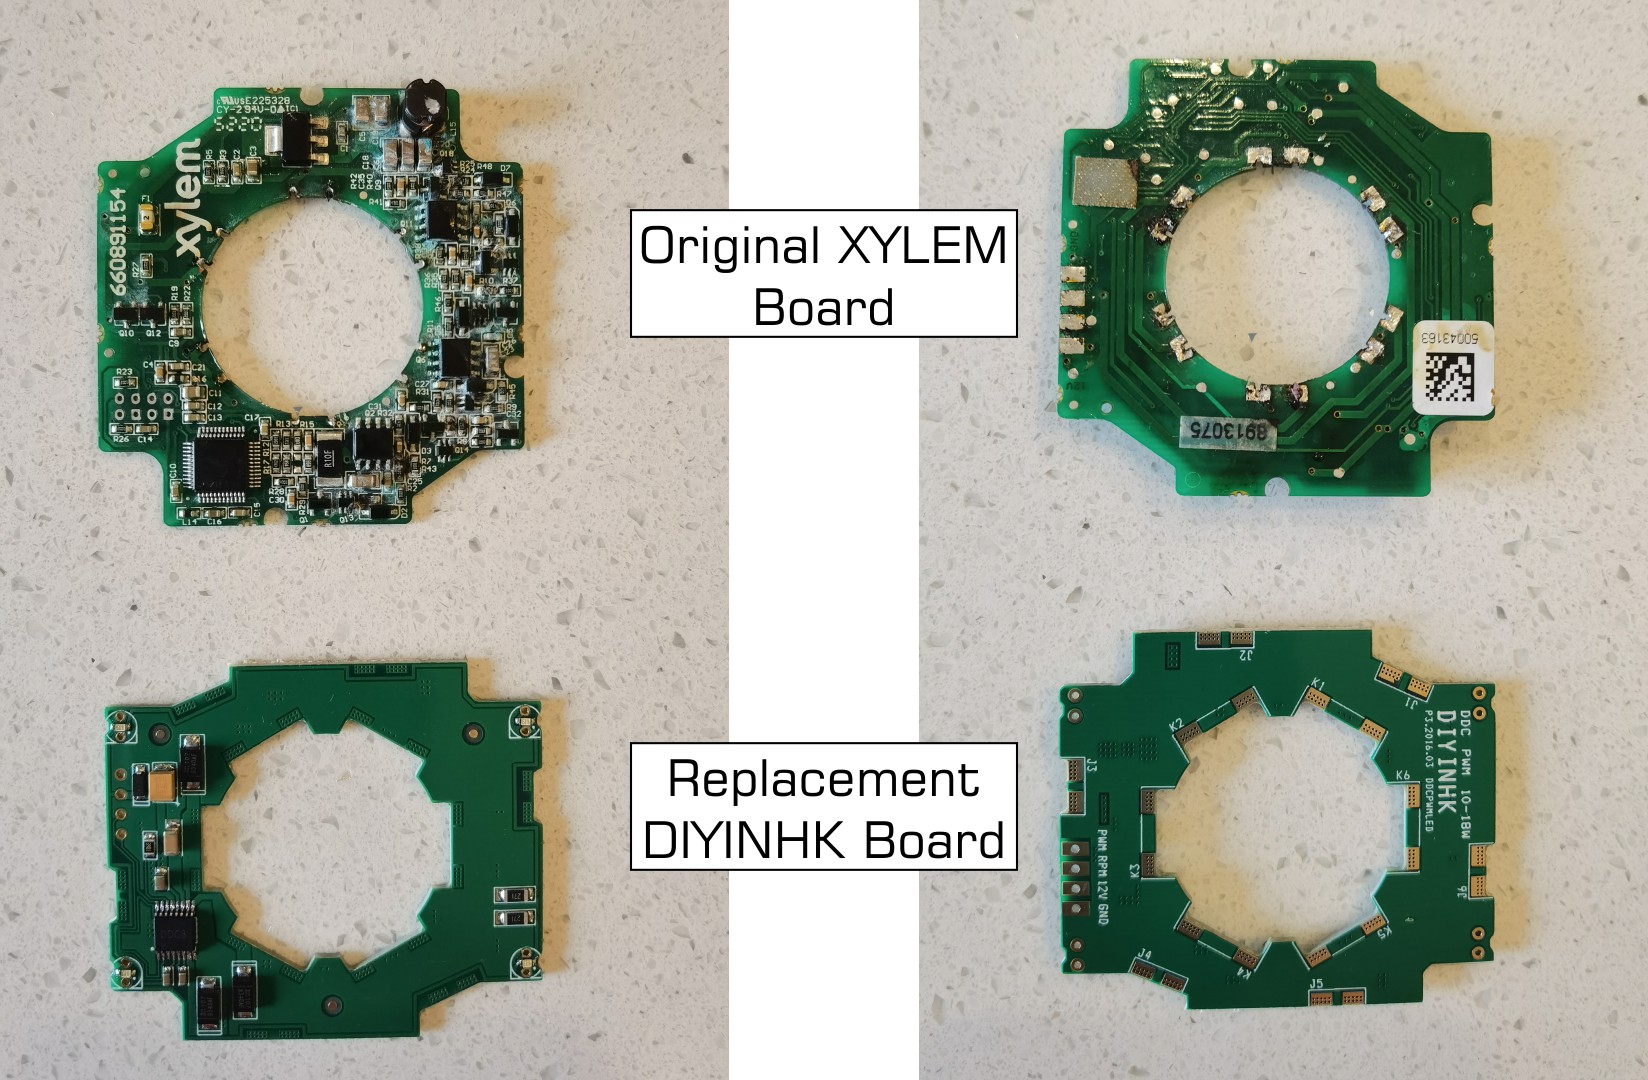
At the end of the day, this circuit board is just controlling a series of electromagnetic coils that drive magnets in the impeller. It doesn’t need to be complicated. The cleaner layout of the DIYINHK board has a certain aesthetic to it. It’s almost a shame that it is hidden away inside the pump housing.
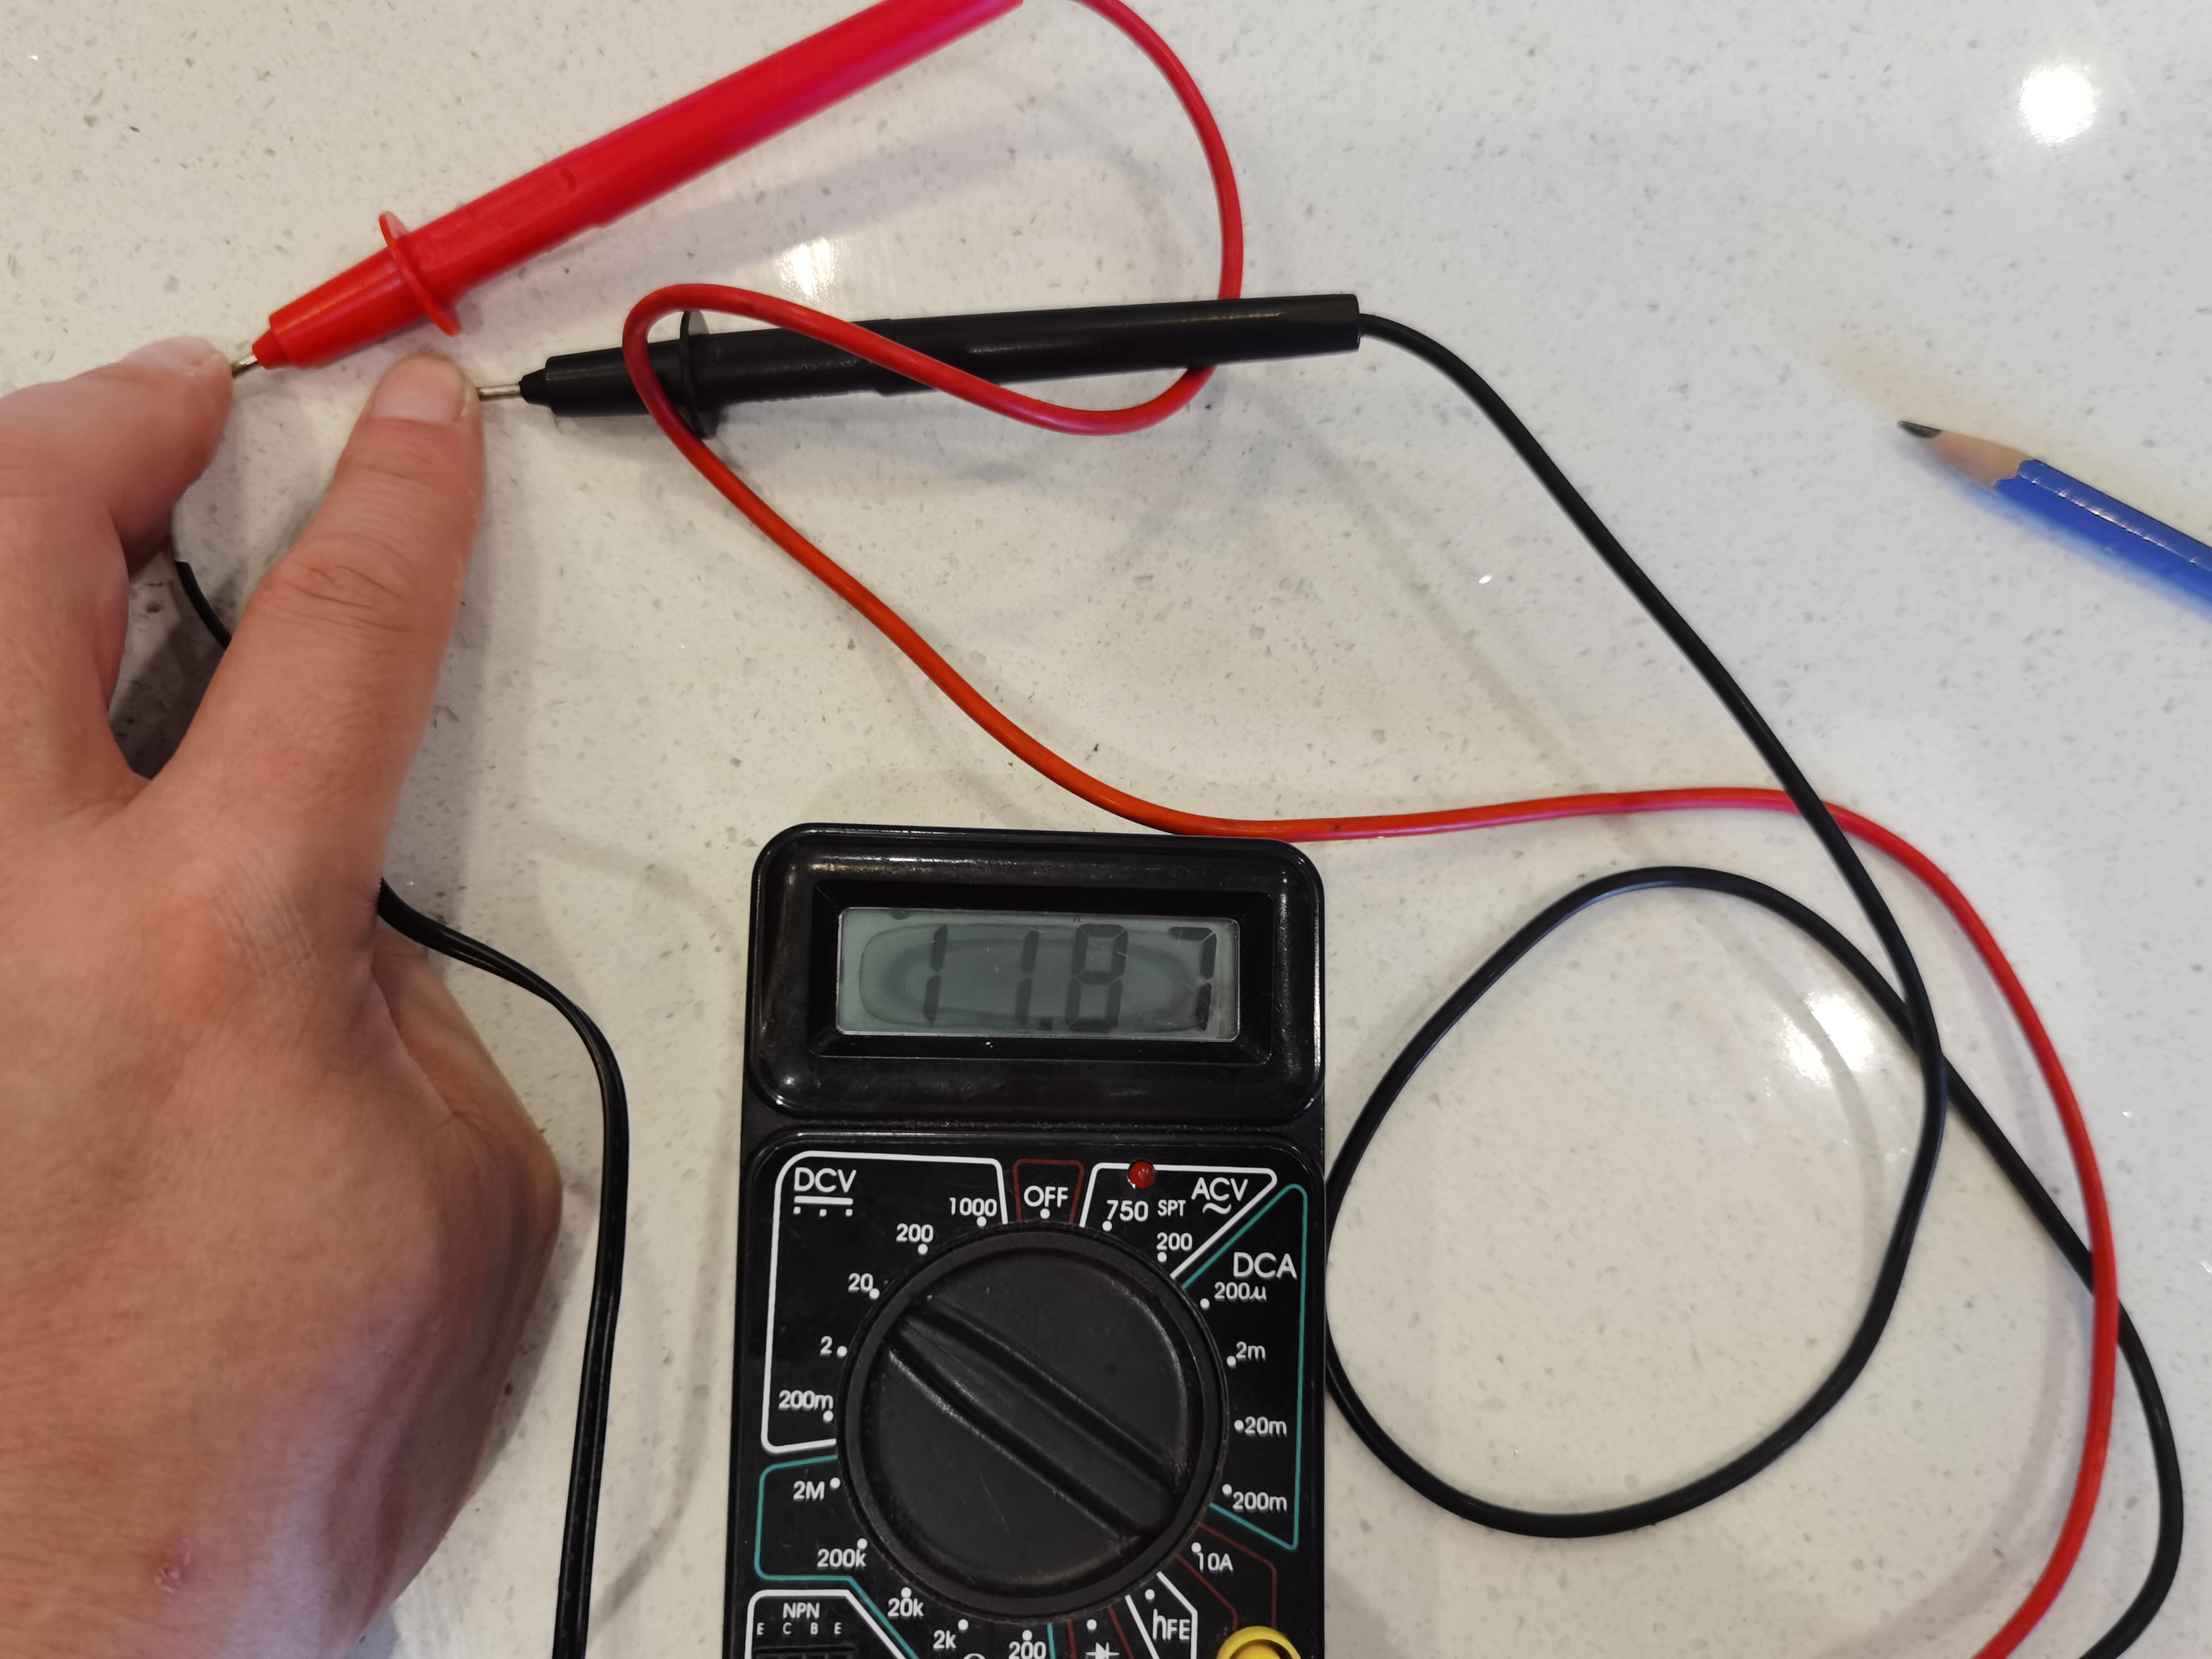
Although the board is a direct replacement for the existing one, the external cables are not connected in the same order. The PWM and RPM (tach) wires from the motherboard fan header were easy enough to identify, but the 12V and ground wires were less obvious. It didn’t help that both wires were black! In such a situation, and having made several mistakes up until this point, it was time to slow down and exercise some care. Out came the multimeter to check which wire was 12V.
With all the wires identified, it was then a matter of putting to board into the pump housing and soldering all the wires back into place. I’m pretty happy with the soldering I managed as it’s not something I do every day (let alone every year).

Finally It Works!
Having now upgraded to a Ryzen 9 5950X (plus upgrading the BIOS and fixing an accidentally bent pin on the processor), upgraded to Windows 11 (and changing the boot drive from MBR to GPT in order to allow use of the required UEFI BIOS), replaced the cooling system for a custom EKWB watercooling loop and then repaired the broken circuit board in the Laing DDC pump, it was once more time to test the system.
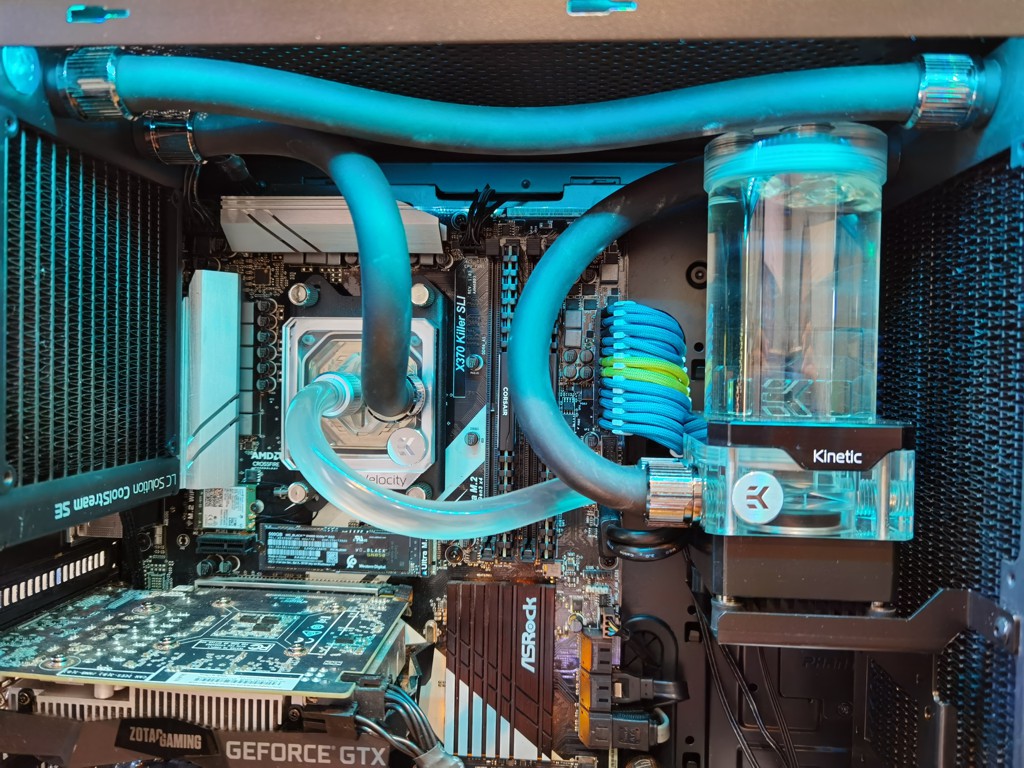
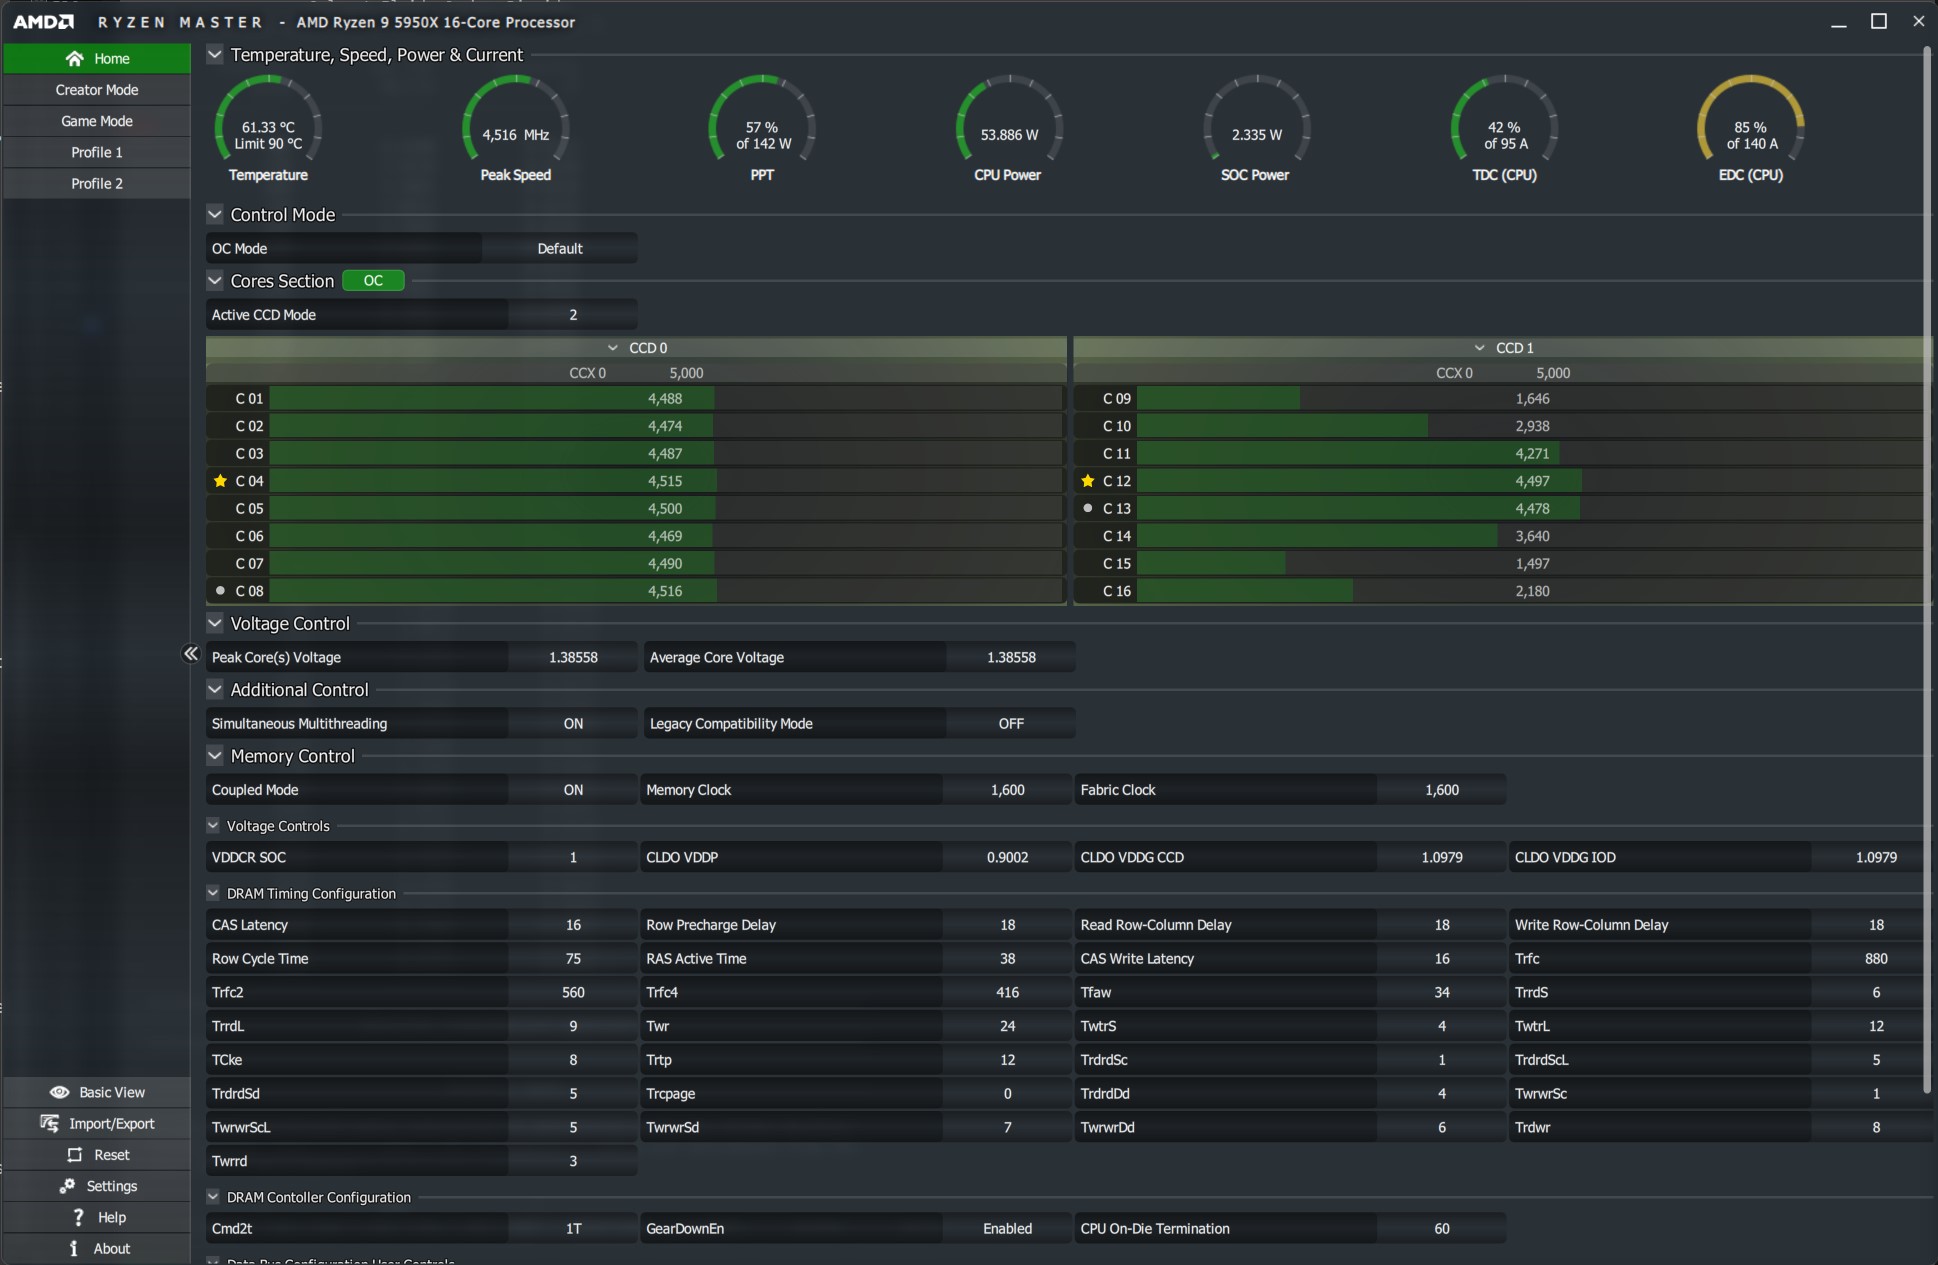
What a relief when it booted. The install is looking pretty neat, with the pump/reservoir combination mounted in the upper half of the case. Crucially, this gives room for a long graphics card to be installed in the future, when the GTX 1650 Super is replaced. The RGB lighting on the pump is not working as I discovered that there are actually two types of RGB control. The motherboard uses the older antiquated style, so a special controller is needed just to run some lights. It’s on the to-do list, but admittedly not very high up. The more important consideration is that the CPU is now being effectively cooled. With idle temps now in the high 30 degrees to low 40 degrees, the watercooling is definitely an improvement on what went before. There is no longer any thermal throttling that holds back the 5950X from reaching its full speeds. When running a full simulation using the OPM Flow reservoir simulator, this pushes the temperatures up over 60 degrees Celsius. That is still very reasonable considering that this is a fairly intensive workload.
Without a doubt, this has been the hardest single upgrade I have ever done on a computer. What should have been a simple swap out of one CPU for another (as per the AMD promise to continue support for AM4 socket) turned into a series of problems, many of which were caused by my own mistakes.
So was it worth it? I’d have to say “absolutely” for two reasons:
- The new processor is much faster than the first generation Zen processor it replaces. This makes running reservoir simulations so much better. Essentially the computer is now a high-end desktop for a fraction of the price.
- Let’s face it, part of the reason why we build computers is because we are curious and want to know and understand more about how they work. Through the mistakes I made on this build, I learned a lot more about how drives are formatted, about building custom watercooling loops and how to fix a Laing DDC pump. It’s often a bumpy journey, yet a rewarding one.