Editing of OPM Flow input decks is conventionally done using a text editor. This is somewhat historical as the file format for the input decks is based on the original ECL (Exploration Consultants Limited) simulator, or ECLIPSE, developed in the 1980s. The input files would have been read into a mainframe computer performed the calculations before creating various output files with those results. Later incarnations of reservoir simulators have added graphical user interfaces, or GUI (pronounced “goo-ee”), to improve the ease of use. However most of these efforts have been focused on visualising the outputs generated. For example the ResInsight software allows manipulation and visualisation of the 3D grid and individual cell properties to be stepped through via each time step.
Creating the input decks remains very much a manual process. This is partly because with the increasing complexity of input data, a variety of different software applications are now used for generation of different parts of the input deck. An obvious example of this is the static grid, for which Petrel software is commonly used, whereas the vertical flow performance (VFP) and fluid pressure, volume and temperature (PVT) relationships are generated using other programs which incorporate equation of state modelling. Whilst the basis for the files created can be sophisticated, the files themselves are encoded with nothing more than ASCII characters. At the end of the day, the humble text editor is used to tie all the pieces together into a functioning simulation input deck.
The approach used has several benefits:
- Use of ASCII encoding means that files are readable by humans with basic and ubiquitous software. Just about every operating system created has a built-in text editor, and ASCII encoding has been around since before I was born and isn’t going to suddenly vanish. Whilst it could be argued that the file sizes created are somewhat inefficient because of this choice, the output files which tend to be larger can be encoded using a more efficient binary format. Furthermore, the ASCII input format was considered sufficient when ECLIPSE was developed in the 1980s, and storage space has only increased in capacity and decreased in cost since then.
- The input decks can be broken up into smaller parts and then combined together at run-time. This means that large text input sections which don’t change can be placed into a separate file, leaving the remainder of the input deck cleaner and making it easier to navigate.
- Editing of text files requires minimal hardware. Expensive workstations or supercomputers can be used to run the simulation, but a humble aging office laptop or desktop can be used to edit the input decks. Furthermore, there is no specific requirement for a specialised operating system. You are free to use whatever operating system suits best.
On the other hand, there are a few downsides:
- Text files are notoriously plain and hard to understand at a glance. When everything looks the same, there are few visual clues available to help guide the user towards whichever part of the document that needs attention.
- The files are very long and monotonous. It is difficult to quickly identify sections, navigate between them, and to identify specific keywords within each section. There is no readily identifiable structure.
- Errors are not apparent. Despite the ECLIPSE language format having a very precisely defined syntax, typographic errors in the input only become apparent when trying to run the input deck with the simulator. The simulator reads the input deck and processes (parses) the commands. If an error is found, it will produce an error message that may (or may not) point to the source of the error.
- The input deck does not have a clearly defined rule concerning whitespace. This is positive in that it does not limit how text is entered into the deck, but it also means that poorly formatted documents are hard to follow as there is no visual structure to the indenting, particularly where columnar inputs are used.
Syntax Highlighting for OPM Flow
Syntax highlighting is a technique used to colour and highlight (a.k.a. “styling”) words in a text document based on their meaning and significance. It is frequently used when editing source code for programming languages as it improves the readability of the text without altering the meaning or function of the text. It is a purely visual aid for human readability. There exist a great number of freely available syntax highlighters for just about every language that has ever been conceived. Despite this, when I tried to find an existing syntax highlighter for the ECLIPSE language, I hit a wall. I simply could not find anything. Maybe reservoir engineers don’t think that syntax highlighting is worth the effort, or if they do, no-one has ever been bothered to implement it and share it with the community.
To rectify that situation, I thought I would try to implement my own syntax highlighter. On the windows platform, a commonly used text editor is the Notepad++ software. This is a lightweight and free replacement for the ubiquitous Notepad application that is built into Windows. It is configurable and can work with a variety of different languages. Given that I use Notepad++ extensively in other workflows, it made sense to start here.
A very basic approach was used to highlight words in the ECLIPSE deck by grouping the recognised commands into different categories:
- Comments: All text after a trailing “/” or following “–” character sequence is treated as a comment. Using a more subdued colour than the main text colour allows the comment to be read, but places it visually into the background, allowing the main keywords and text to stand out more.
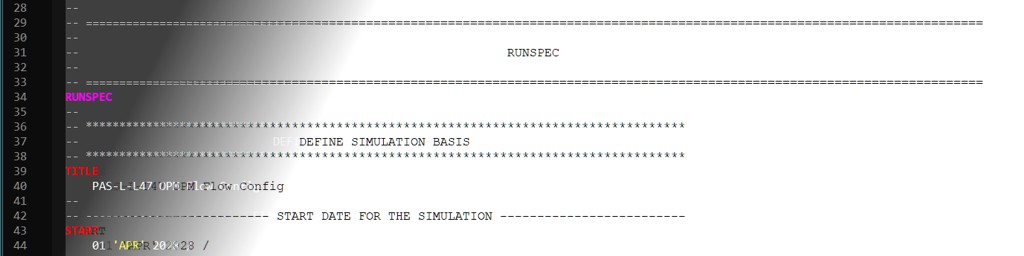
- Section keywords: These are the eight main sections of an ECLIPSE deck. “RUNSPEC”, “GRID”, “EDIT”, “PROPS”, “REGIONS”, “SOLUTION”, “SUMMARY” and “SCHEDULE”.
- Commands: Most keywords fall into this category. These are the reserved words that instruct the simulator to carry out a specific aspect of the simulation.
- Arithmetic operations: Certain keywords are used to manipulate the static grid array and it is useful to use a different colour to identify these keywords. Examples of these keywords are “EQUALS” and “OPERATE”.
- Arrays: The cell properties that are modified by the arithmetic operations are mostly different to command keywords or strings. As such it makes sense to use a different colour for these too. Examples of these keywords are “PORO” and “SWATINIT”.
- User-defined quantities:
- Strings: String literals are surrounded by single quotations “’”.
An example of syntax highlighting in use can be seen in the following “SOLUTION” section. Here normal black text on white background is compared against a custom syntax highlighting in dark mode. Comments are grey, section keywords are magenta, commands are red, arithmetic operators are green, arrays are orange and strings are yellow. There are no UDQs in this example.
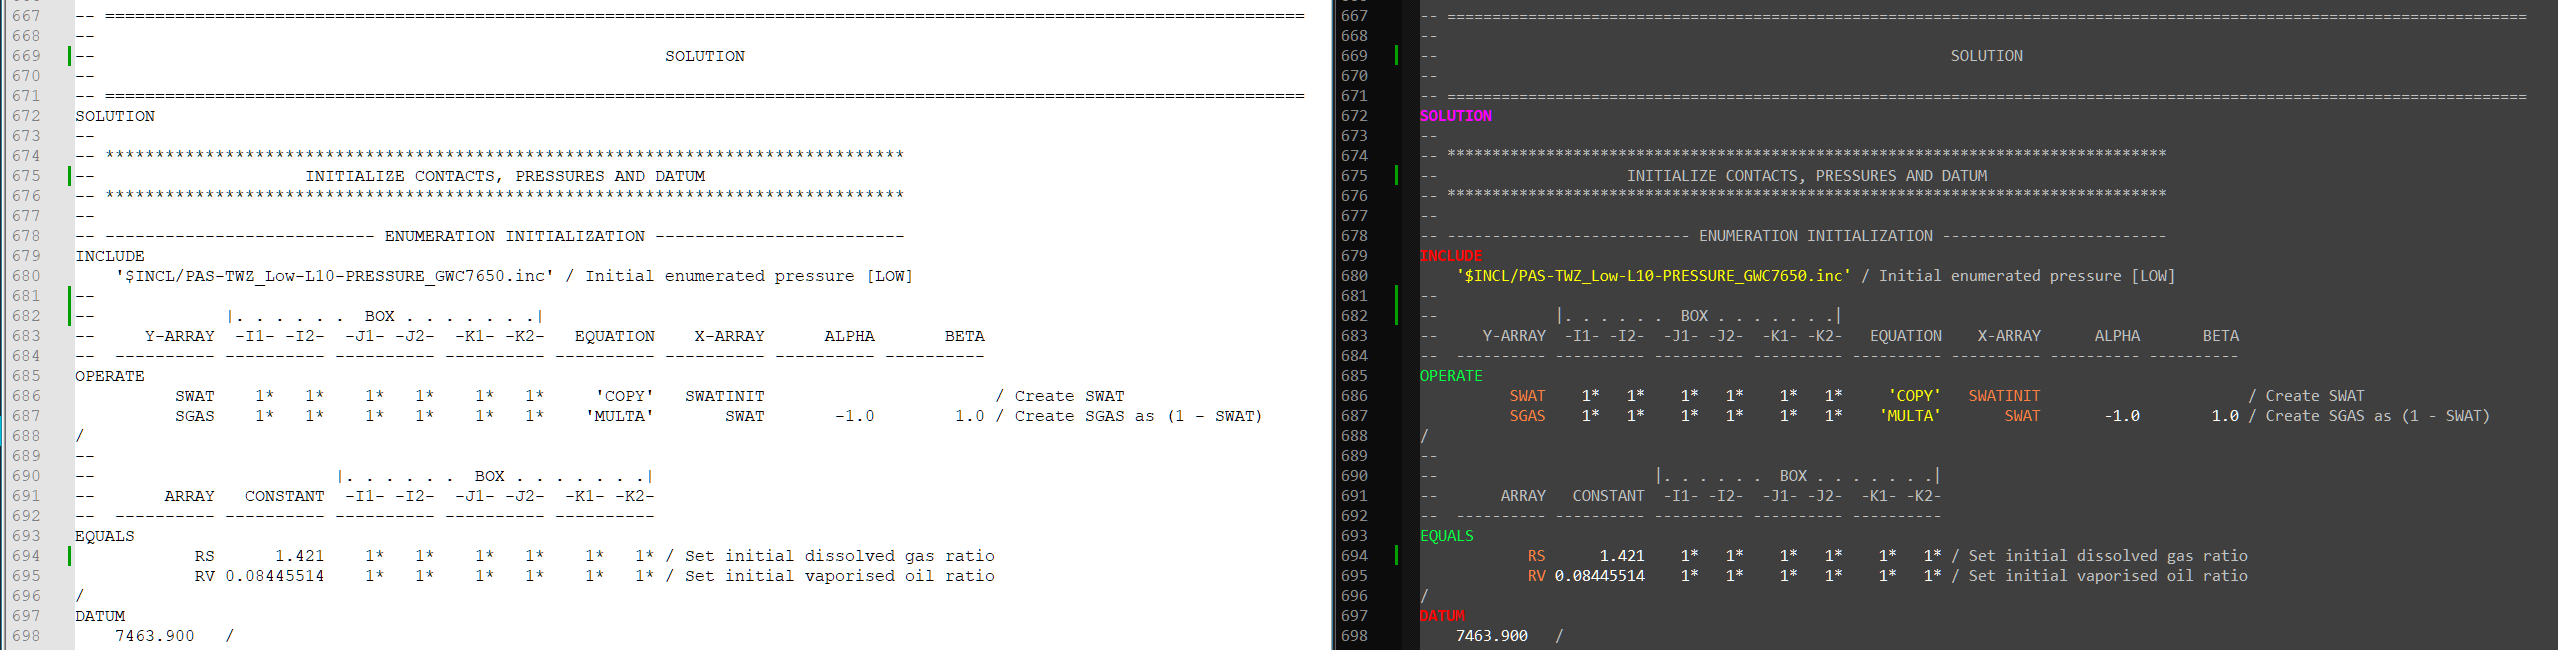
Although this is a very basic improvement to how text for an input deck is displayed, it is immediately clear that the purpose of words is greatly improved by this example. The comments are still readable, but do not dominate the overall visual impression of the text. Strings and numerals are clearly distinct from both each other and keywords. Keywords are also clearly distinguished as either commands, arithmetic operations or array identifiers.
If you’d like to try out the syntax highlighting for yourself in Notepad++ then the following user defined language file can be imported.
Syntax Highlighting with NetBeans Platform
Syntax highlighting using Notepad++ is a basic demonstration of the principle of syntax highlighting applied to a reservoir simulation input deck. A more robust approach would be to leverage existing code editing tools to provide a language-aware text editing environment specific for the ECLIPSE language and its variants. In addition to syntax highlighting, such an editor would know what allowable combination of words should follow each keyword. This would permit context sensitive auto completion to be used. Another potential benefit is to recognise whether or not terminating “/” characters are required. This would allow erroneous input to be detected during editing of the deck, rather than finding out when running the deck (and hoping for a clear error message to be thrown). It would also allow for code folding to be applied, so that comments or long keywords can be collapsed, thus making it easier to navigate and read the input deck.
The Pyrus suite that I’ve been developing on and off for many years (mostly as a personal tool as I’ve never released it) is built on the NetBeans rich client platform. This platform has components for text editing, and the text editors can be adapted to recognise and work with other languages via lexical analysis. The plan is to write a module in the NetBeans platform that recognises ECLIPSE format files (*.ecl) and via a custom lexer will be able to apply syntax highlighting, and via a custom parser will also allow for code folding, context sensitive completion and error highlighting.
I have no idea how long this will take but it’s a nice project to have in the background.
Conclusions
Syntax highlighting is a very simple concept and is easily implemented. Using the Notepad++ software as a testbed, it has been shown that syntax highlighting can be applied to reservoir simulation input decks to aid with visual presentation of the file. Modern integrated development environments for programming languages also include features like code completion, context sensitive auto completion, error checking and code folding. Using the NetBeans platform it should be possible to also implement these features for the OPM Flow input decks.