Once a SEG‑Y file has been inspected and validated using the SEG‑Y Inspector Tool, the next step is to import the seismic volume into a Pyrus project. The import process reads the SEG‑Y file, extracts geometry, interprets header information, and converts the seismic data into Pyrus’ internal format which leverages the heirarchical data format (HDF5). This article explains how to launch the import workflow, how Pyrus interprets SEG‑Y metadata, and how to verify the imported volume.
Launching the SEG‑Y Import Wizard
To begin the import process, it is first necessary to have a project into which the data can be imported. By default there is no project open in Pyrus so one must be created. A Pyrus project is simply a structured folder location on a local drive which is used to store data that has been optimised for use with Pyrus. Create a new project using the menu option File > New Pyrus Project or click on the new project icon on the toolbar.
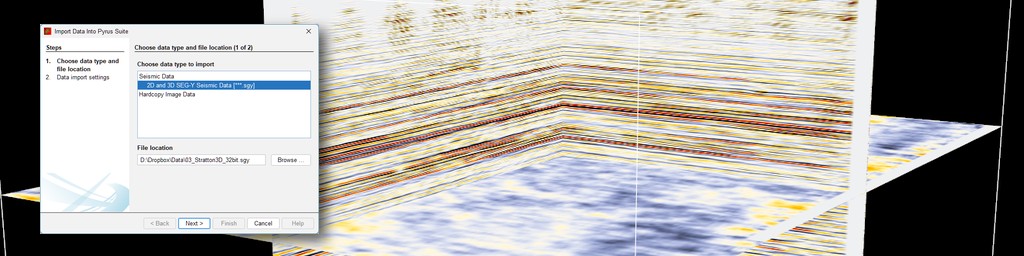
Once a new project has been created, and is open in Pyrus, we can import our seismic data into the file. This is accomplished using File > Import Data or the import data icon on the toolbar. This opens the Import Wizard, a guided workflow that walks through the necessary steps to bring data, including seismic data, into a Pyrus project. At the time of writing, as seen in Figure 1, there are only two types of data that can be imported into Pyrus: (1) Seismic Data, and (2) Hardcopy Image Data. The types of data that can be imported is expected to grow. For the moment, double-click the ‘Seismic Data’ category and select the ‘2D and 3D SEG-Y Seismic Data [***.sgy]’ option to import SEG-Y data.
For this example we will import the Stratton 3D survey which is made freely available by the Bureau of Economic Geology at the University of Texas at Austin.
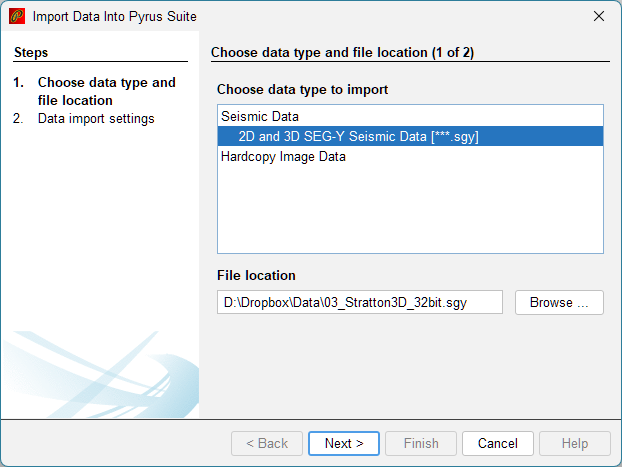
Once the SEG-Y file is selected, click on ‘Next >’ to proceed to the next step in the import wizard.
Confirming Header Byte Locations
The next page of the wizard is similar to the SEG-Y inspector that displays basic metadata extracted from the textual and binary headers, along with trace and line previews. Before importing, it is essential to ensure that the byte locations for key trace header fields are correct. These include:
- Number of samples per trace
- Sample interval
- Inline number
- Crossline number
- X-coordinate
- Y-coordinate
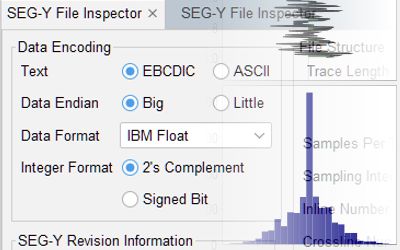
If you have already used the SEG‑Y inspector tool and saved the header locations into the binary header, these values should be correct. If not, the import wizard allows you to adjust them. Refer to the SEG-Y inspector for more information on how to do this. Figure 2 shows the header byte locations correctly set for the Stratton 3D file.
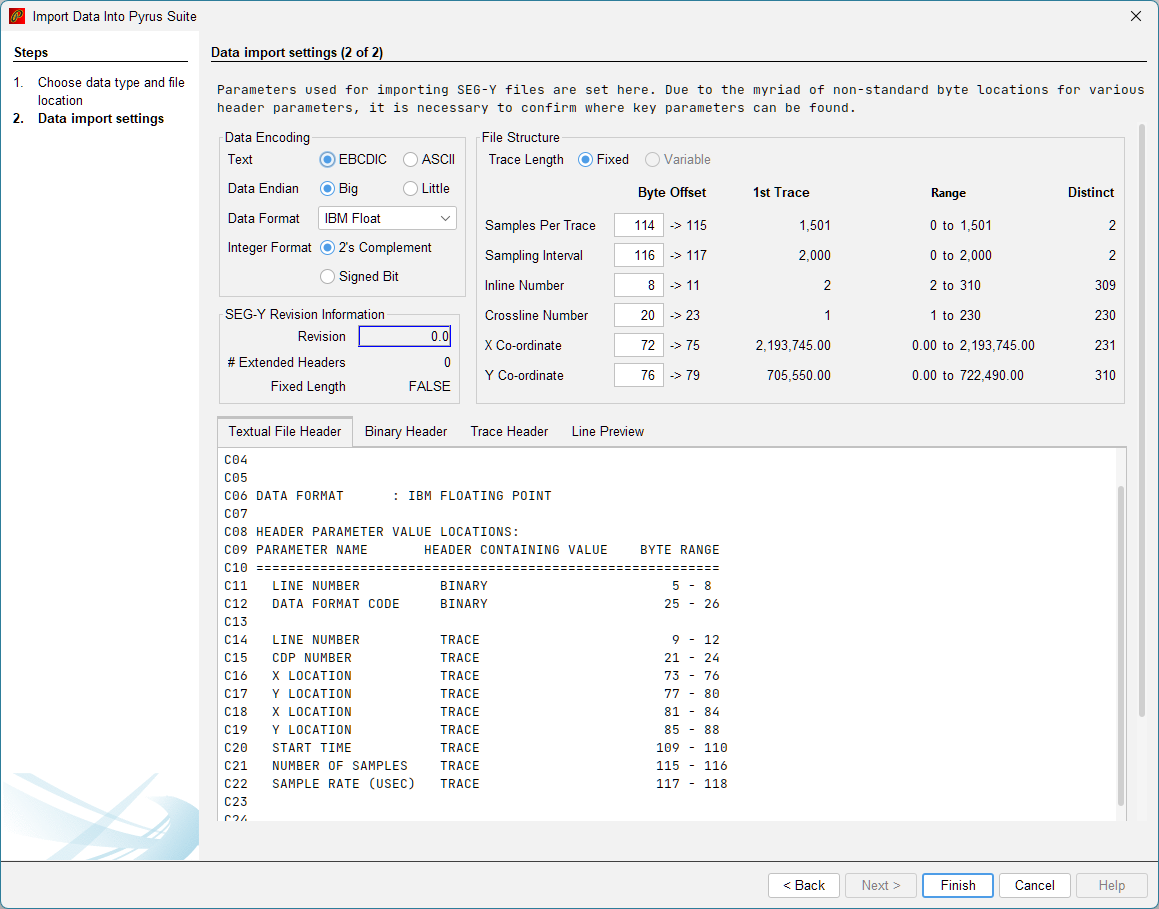
Correct byte locations ensure that Pyrus can correctly interpret geometry and trace metadata. This is needed because SEG-Y files can hold data in very different byte locations, despite the format being supposedly standardised.
Data Import
Once the correct header locations have been identified, the data can be imported into Pyrus by clicking on the ‘Finish’ button in the wizard. This will start the import process that copies the data from SEG-Y into the Pyrus internal HDF5 storage format. This process re-organises the data structure within the file so that it can be used more optimally with modern hardware. It should be borne in mind that as a format SEG-Y was developed in the 1970s, and was originally specified with regards to how to sequence the bytes on magnetic tape. Modern drives, including solid state drives, have very different capabilities, and it makes sense to take advantage of these newer devices.
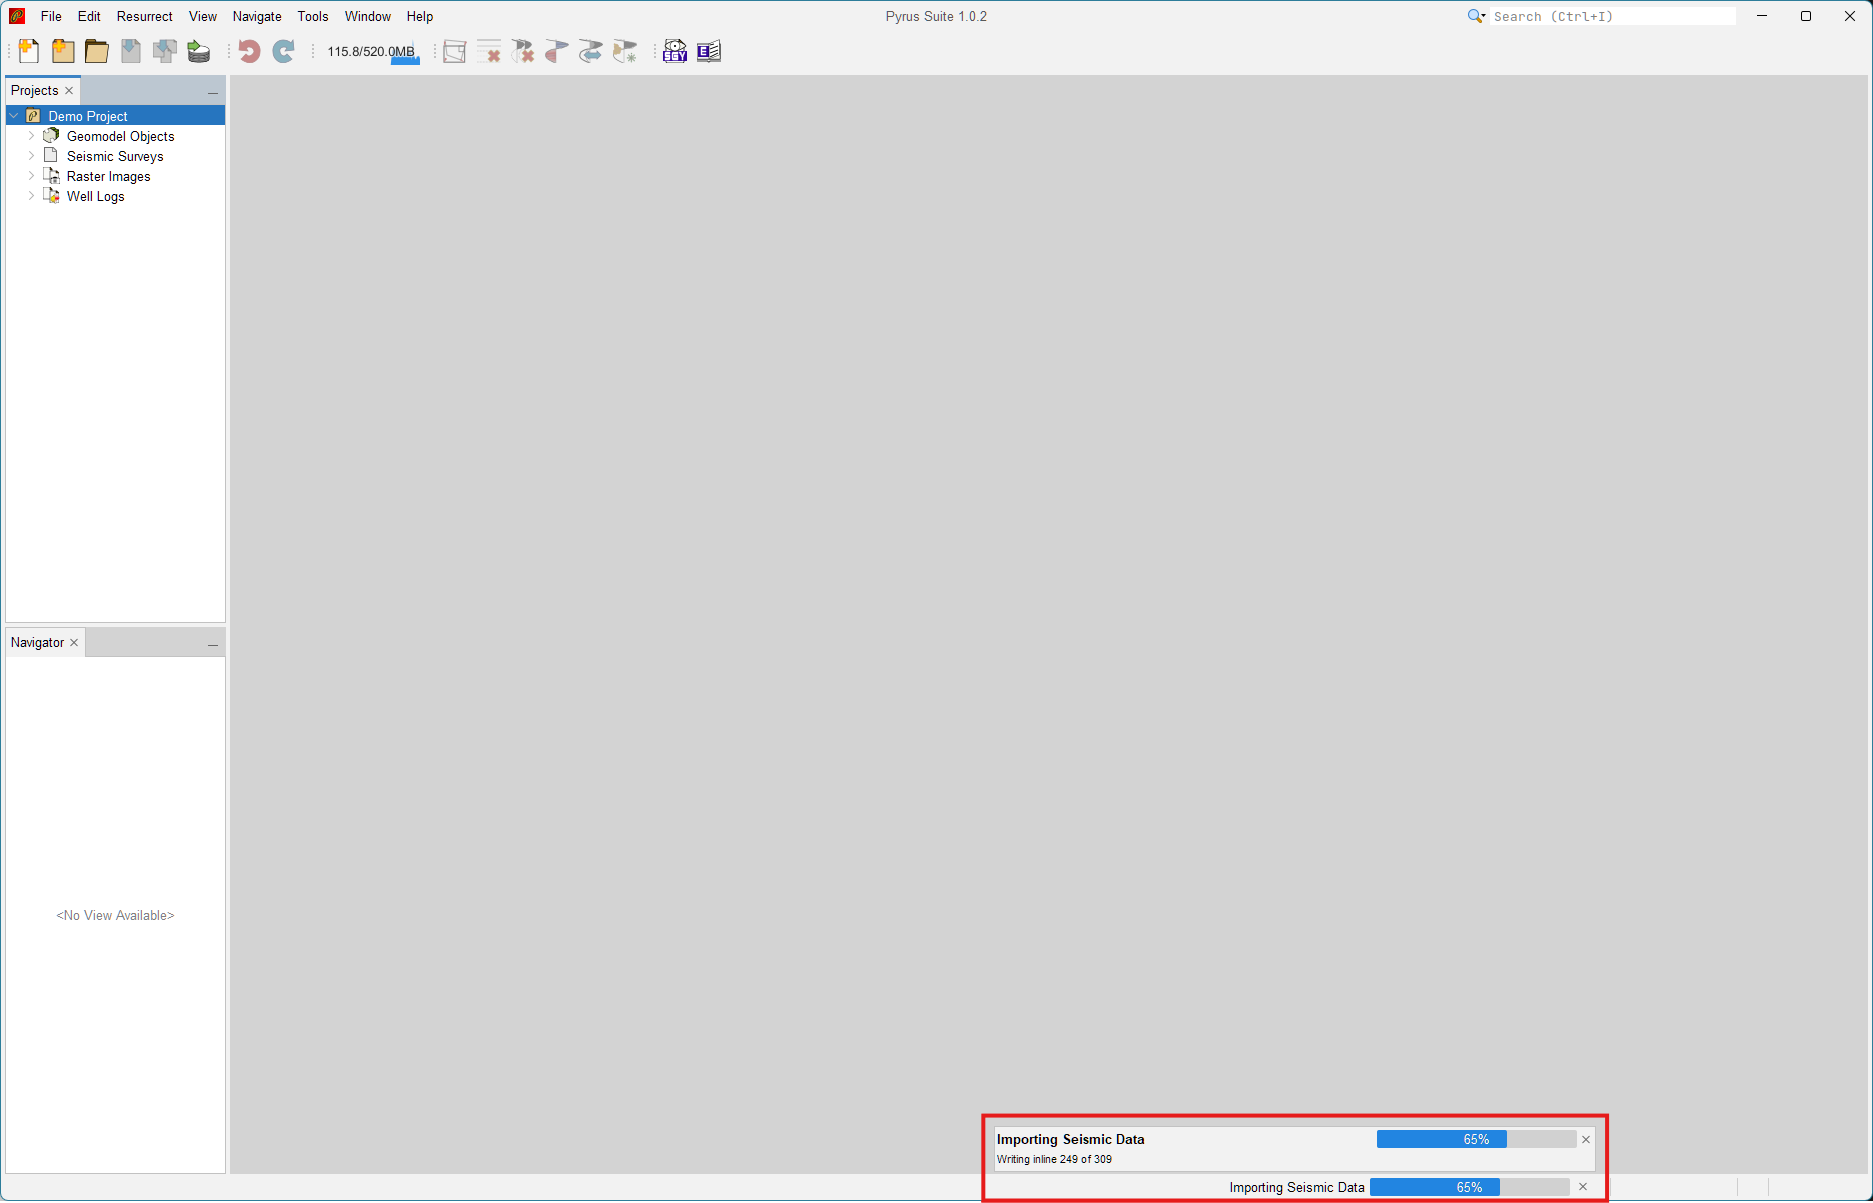
The import process can take a while for large SEG-Y files (about 40 minutes for a 25 GB seismic cube). The import sequence needs to read each inline from the SEG-Y file and write this (uncompressed) into an HDF5 dataset that has been structured to split the file into chunks of about 2 MB each. Once all the uncompressed chunks have been written, the chunks are then compressed using Zstandard lossless compression. A visualisation dataset is also written where values are clipped and scaled to range from 0 to 255. Although this loses precision in comparison to the original floats, for viewing of data there is an impercepible difference when using conventional colour maps to display the data. By reducing the precision of the data to 8-bit integers, the display of data can be sped up enormously.
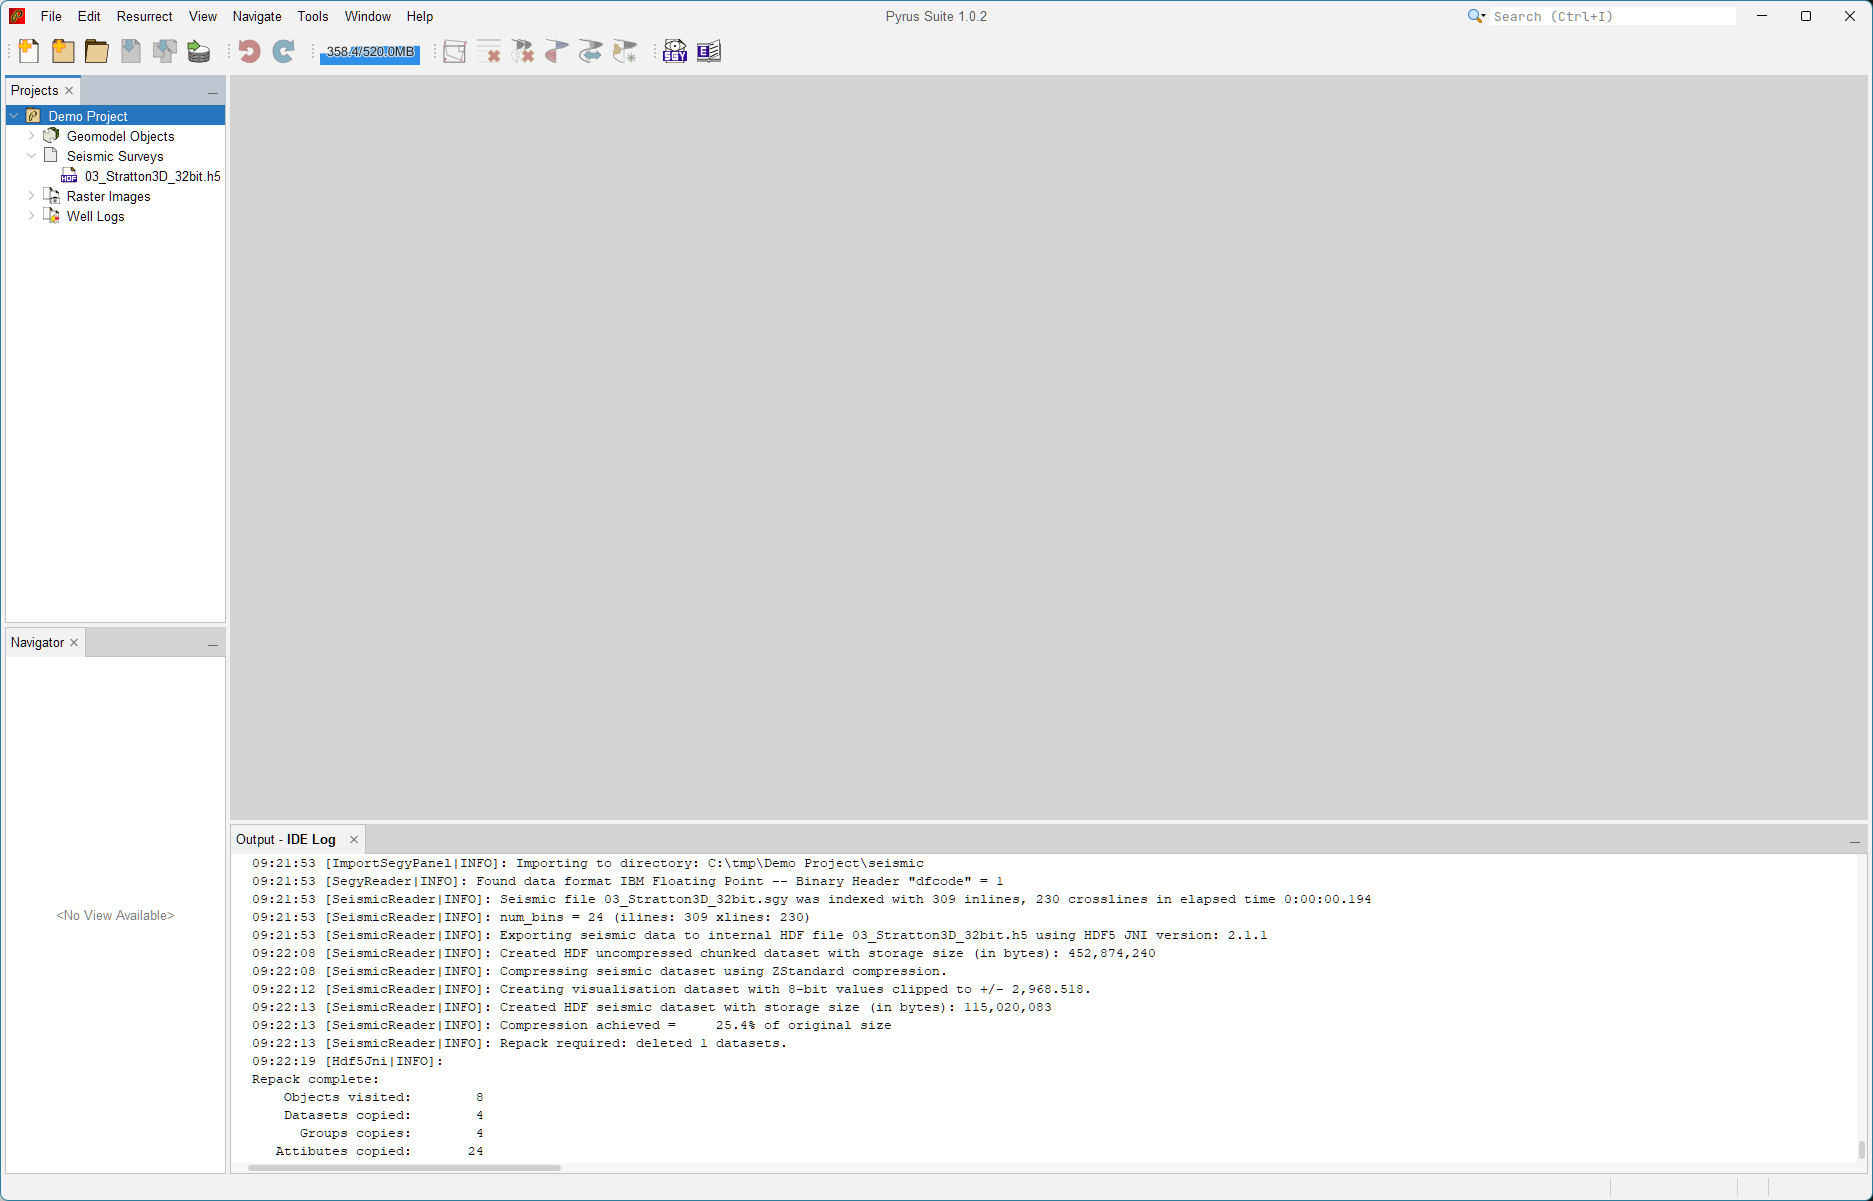
Further information on import progress can be seen by opening the log window for the application (View > IDE Log from the menu). The logged import for our example 3D Stratton seismic file is shown in Figure 4. It can be seen that the import of this small cube (~450 MB) took less than half a minute.
About Pyrus Internal HDF5 Format
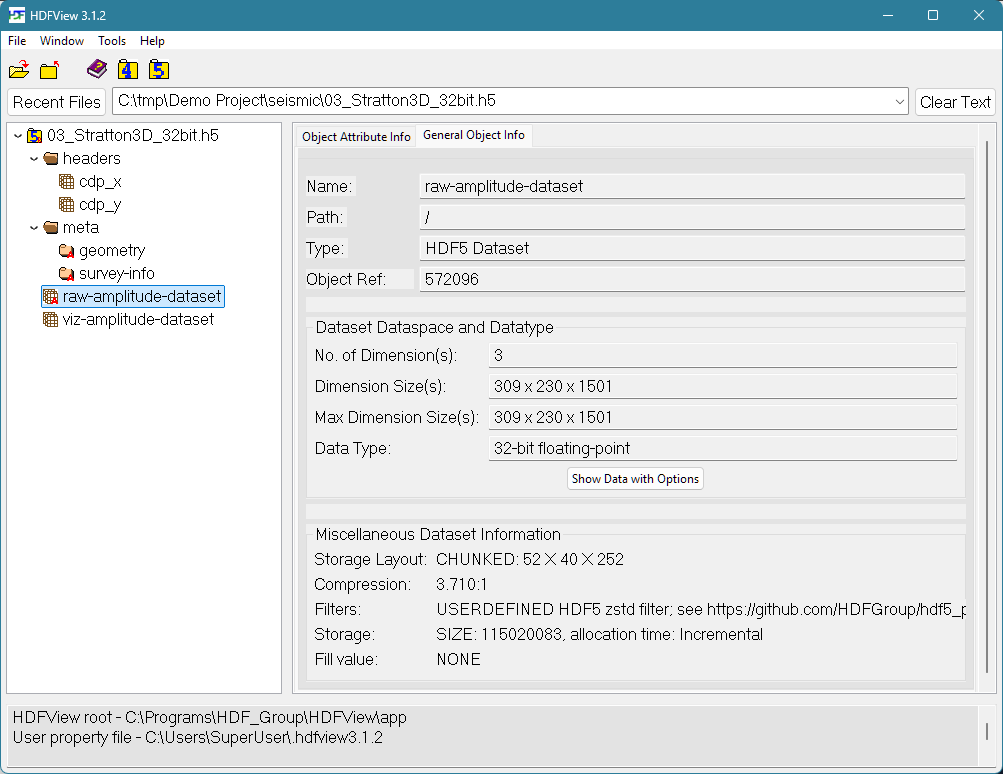
The internal HDF5 format creates two datasets. A raw dataset containing the floating point data stored using lossless compression, and a visualisation dataset where values have been scaled to appropriate 8-bit integer values. Although this structure effectively creates two cubes, because the cubes use compression the overall file size is typically smaller than the original SEG-Y.
The internal Pyrus format has two datasets:
- raw-amplitude-dataset: Contains the original floating point data compressed using lossless Zstandard compression.
- viz-amplitude-dataset: Contains 8-bit integer representation of the dataset clipped and scaled to range 0 to 255.
In addition the useful metadata from SEG-Y is preserved.
The ‘headers’ folder contains selected trace header information, such as the X-coordinate (cdp_x) and Y-coordinate (cdp_y) locations for each trace. These are stored in metres according to the coordinate reference system that was used.
The ‘meta’ folder contains two groups. geometry contains information about the layout of data within the datasets, including the number of samples in each direction, the spacing, inline and crossline numbers and intervals. The survey-info group contains information about the location of the 3D survey in spatial coordinates, such as the origin, point on the I-axis and point on the J-axis.
Verifying the Imported Volume
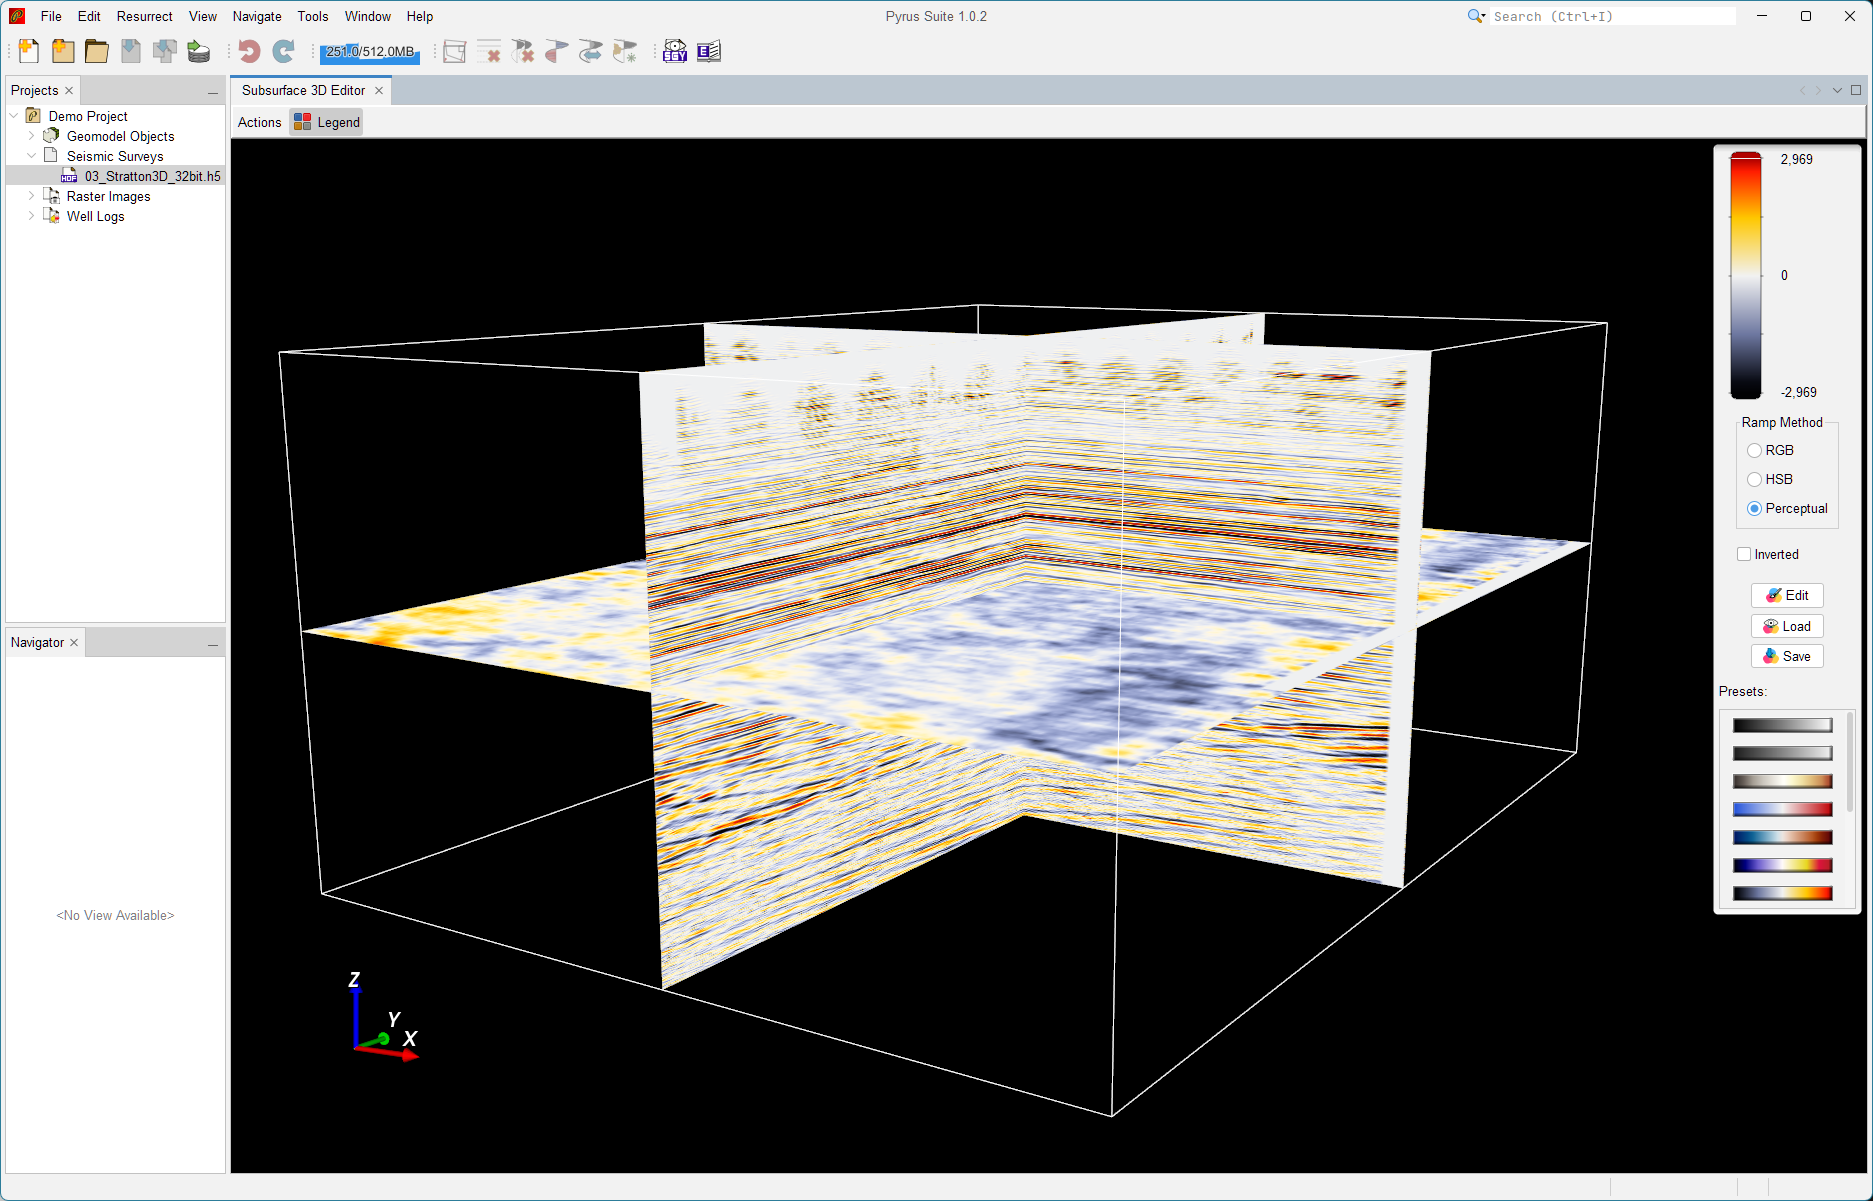
Once the import is complete, the seismic volume can be opened in Pyrus. This is achieved simply by navigating to the HDF5 file in the ‘Seismic Surveys’ category of the Pyrus project, and double clicking on the file (or right-click > Open). This opens a 3D subsurface viewing window that displays the cube as a wireframe for the full cube extend, plus a single inline, crossline and Z-slice. An example of the imported demonstration 3D Stratton volume is shown in Figure 6. The cube can be manipulated with the following controls:
- Left Mouse Button: Rotates the seismic cube.
- Middle Mouse Button: Pans the seismic cube.
- Mouse Wheel: Zooms in and out from the seismic cube.
- Left and Right Arrow Keys: Moves the selected inline.
- Up and Down Arrow Keys: Moves the selected crossline.
- Page-Up and Page-Down Keys: Moves the selected Z-slice.
Colour maps can also be changed, edited and saved. A variety of preset seismic colour maps are included with Pyrus.
Summary
Importing SEG‑Y data into Pyrus is a straightforward process once the file has been inspected and validated. The import wizard guides users through identifying the correct header byte locations that are needed, and converts the SEG-Y into an internal format. With the SEG‑Y file successfully imported, the seismic data becomes fully integrated into the Pyrus environment and ready for further analysis.